Digital connectivity is a driving feature of our lives. While invaluable in our personal lives, it also has the potential to transform manufacturing processes. In many cases, this has already taken root. But in one area – 3D measurement activities – it has so far not been used to the fullest.
Manufacturing processes can be improved in a number of ways, but data is often the direct way there. Data, it’s often been said, is the new gold. When applied to 3D metrology, better use of data can bring significant benefits to all involved in the product engineering process, whether they are operators, quality or manufacturing engineers, or designers.
For example, manufacturing engineers can investigate and troubleshoot issues faster if they have immediate access to 3D measurement data. A designer’s task of assessing the effectiveness of design changes is simplified by reviewing 3D inspection data.

But in 2021, managing 3D measurement data is a major challenge.
Large file sizes are often an issue. The growing popularity of 3D scanning technologies yields large inspection projects whose size typically exceed 1 GB for 10 scanned pieces. This represents a massive amount of data to manage – especially considering that organisations could measure hundreds or even thousands of pieces yearly.
It is possible to have 3D metrology data managed better in today’s manufacturing processes, with benefits for product engineering, manufacturing, and metrology teams.
Modern data management system for 3D metrology
Today people exchange 3D measurement data by saving files and folders on network drives, or perhaps exchanging USB sticks. These methods have several drawbacks. First, saving files and folders is a manual process. Next, searching for data takes time. And when you’re pressed for time, manually browsing for the files you need is an especially painful process. Another issue is the high risk of data loss, or accidentally overwriting data.
Similar issues have been resolved by computer-aided design (CAD) platforms with product data management (PDM) systems that completely manage CAD data. The key technological foundation behind the tools that we use in our private lives and PDM systems is that all the data is managed by a central data management system. We need a similar solution for 3D metrology data.
Modern data management systems automate the handling of all files and folders to eliminate manual operations, and minimise the risks involved in mishandling the data. They make it easy to backup 3D measurement data and safeguard it in the process. They also keep track of revisions when the data is modified.
When you centralise data within a modern data management system, it becomes a valuable business asset. The benefits reach all corners of the company. You eliminate data silos, and your organisation has access to a common source of trusted data.

Increase the value of 3D measurement data by sharing it with all stakeholders
With a modern, centralised data management system in place, enterprises can open up access to their data gold mine in the same way Google opens up access to the Internet. This opens the door to doing much more with your data, such as data mining and analysing trends to help you solve problems, see performance, and improve processes.
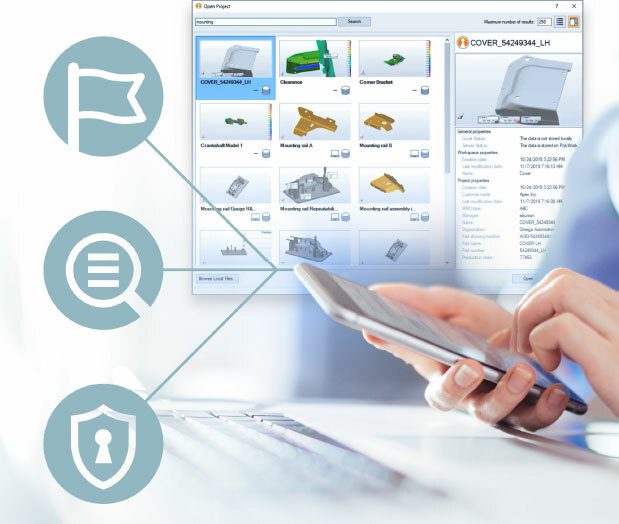
How is data accessed by users? Through a simple Index-Search-Filter mechanism.

Indexing information makes it possible to identify key properties for fast access, like serial number, part number, and production line number, and store it in the database. This first step is crucial as conscientious use of properties (metadata) ensures that future searches will be accurate and complete.
Next, search. Similar to using Google, you quickly find projects by typing relevant keywords associated to indexed information. Finally, when needed, you can filter the results to locate the key data you need.
Permission management should not be overlooked. It is needed to control who has access and what can be done with the data. With these protections in place, only the people with the appropriate credentials can modify the data.

Modern digital collaboration tools to boost teamwork efficiency
Manufacturers are always searching for more efficiency in their work and ways to optimise costs. Today’s increasingly flexible work environments, with more work from home along with multisite projects, outsourcing, and other external partnerships represent a changing paradigm. Digital collaboration is the key to building bridges between the isolated communities within companies and their supply chain.
Let's consider three examples:
The first is the need to exchange 3D measurement data quickly, without transferring large files. Rather than sending a large amount of data, the solution is to provide time-saving clickable hyperlinks that give users instant access to the 3D measurement data, on any web or mobile platform.
The second is the need to review 3D measurement from anywhere. The solution – as with so many areas of our lives – is as easy as opening up 3D measurement data in a Web browser or on your mobile phone. No matter where you are, you’re connected.
The third is the need to investigate issues with people in different locations reviewing the same data. This is also easily remedied. You can link discussions to 3D measurement data and use notifications to reach colleagues. With concurrent-access capabilities, companies can monitor and analyse 3D measurement data in real time. This simplifies the manufacturing process. It becomes possible to measure, edit, and analyse all at the same time.
With the right data management infrastructure in place, companies can benefit from the enormous amount of data that is generated by 3D measurement, instead of being hindered by it. By mining this data more effectively, productivity and product quality get a boost, giving companies an advantage against competitors.