PolyWorks Inspector™ Tip
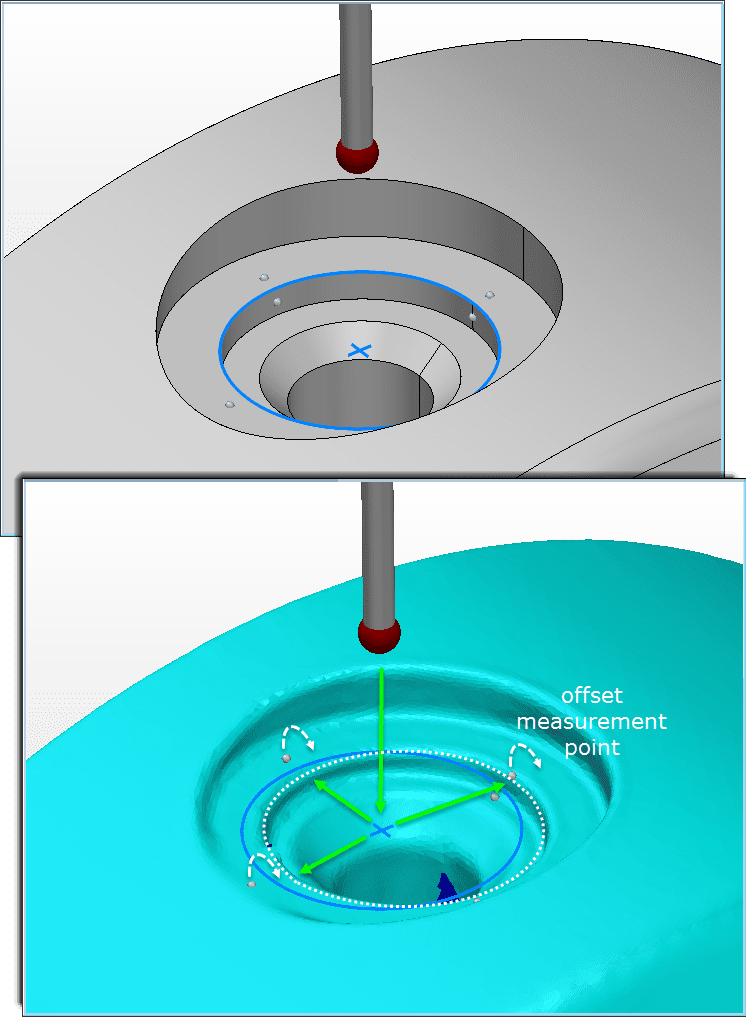
When probing holes with CNC CMMs, the precise location of each measurement point may be critical to ensure accurate measurements. In such cases, you can use the locate centre option when measuring a hole to preserve measurement point locations with respect to the actual hole’s estimated centre. By quickly pre-measuring the hole and accounting for its deviation, you make sure that the probe contacts the intended surface when acquiring points.
Step by step: To enable the locate centre function for an internal circle:
- Double-click the internal circle to display its property sheet.
- From the Measurement tab:
- Make sure the measurement Method is set to CNC Probe and the Sub-method to Standard.
- Expand the Measurement point offset
- Select Locate centre.
- Optional: If you expect the actual hole to be above or below the circle’s nominal plane by more than default value, increase the Offset to plane
- Click Apply and Close.
Before CNC probing the circle, the locate centre function behaves as follows:
- The probe tip enters the hole at the nominal circle centre.
- The probe stops at a depth that corresponds to the Offset to plane value.
- The hole centre is estimated by acquiring three points within the hole.
- Then, the CNC probing of the circle is automatically launched. It uses measurement points that have been offset according to the estimated location of the circle and the other parameters specified on the circle’s property sheet.
NOTE: If the piece is highly deviated, the probe tip may fail to enter the hole in the first place. In this case, the Search hole function, also offered in the Measurement point offset section, can be activated to first find the hole. This operation precedes the locate centre operation. The Search hole and locate centre functions may be efficiently combined and are fully compatible with each other.


