PolyWorks|Inspector™ Tip
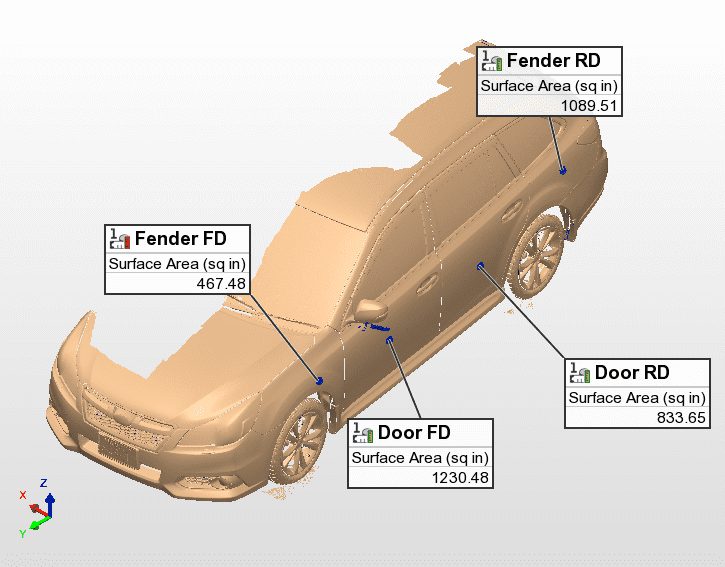
Correctly estimating surface area for certain of your processes, such as painting or surface finishing, is a common but time-consuming task. With PolyWorks|Modeler™ Light, which is offered in the PolyWorks|Inspector Premium package, you can now use your existing scanned polygonal models to quickly and precisely measure surface areas. This saves you manual measurement operations and you can include the area information in your projects as custom measurements.
Step by step: To measure surface area on a polygonal model from PolyWorks|Inspector:
- In PolyWorks|Inspector, right-click the desired polygonal model and choose Transfer to PolyWorks|Modeler from the shortcut menu that is displayed.
PolyWorks|Modeler Light starts with a new project containing a copy of the polygonal model (see NOTE).
- In PolyWorks|Modeler Light:
- Click the Select Elements button on the Selection toolbar to activate the Select Elements mode.
- Select the surface of the model that you want to measure. You can click the All button in the Dialog Zone to measure the whole model.
- From the top menu, choose Polygons > Analyze > Area. A message window pops up, displaying the calculated area.
- Optional: In PolyWorks|Inspector, create a custom measurement for the area:
- From the top menu, choose Measure > Custom Measurements > Create. The Create Custom Measurements dialog box is displayed.
- Make sure the Type is Numerical .
- Click Anchor and then click over the object where you want the annotation to be anchored. A new custom measurement object is created. Right-click to leave the anchoring mode.
- Click Close to dismiss the dialog box.
- In the Geometry Controls pane, add the measured value obtained from PolyWorks|Modeler Light to the new custom measurement.
NOTE: If you have a PolyWorks|Modeler Standard or Premium license, either one of these will be started instead of PolyWorks|Modeler Light, as they contain more tools to edit polygonal models.


